Welcome back to Discovering Alone. It’s time to learn more about how to play Alone depending on the side you are – the Hero or the Evil. The Hero can only see the nearby Sectors, playing a game of exploration, deduction, and survival. On the Evil side of the screen, things are completely different. This article will focus on the Hero gameplay.
As said in the game overview, the Hero starts the game with little to no information. He finds himself alone (quelle surprise!) in an unknown place, and he will have to gather as many information as he can about where he is and who his enemies are, to improve his chances of survival.

Alone: Hero plays a game of exploration, deduction and survival.
The complete map is hidden behind the Evil screen. The Hero will never look at it during the game. On his side of the screen, several Map tiles, a bigger replica of the single sectors depicted on the complete map, will be used to gradually reveal the layout of the map as he explores the environment. Only the starting sector and his own miniature will be visible to him. He will see the Evil players play cards to set traps for him, but most of the times this will only happen behind their screen. Nothing will be apparent, at first.
Each time the Evil players place something on the complete map, though, they will give the Hero clues in the form of radar signals. If the Hero is at a crossroads, and the Evil players will tell him “You hear a radar signal from the East”, maybe it’s not a good idea to move in that direction. Maybe, it is… are the Evil players placing traps exactly on the route to the Hero’s next objective? Should he take the risk to approach his goal? Or rather, do they want to make him think that, but it’s actually a bluff? A big part of the Hero’s gameplay is about unknown dangers and deduction.
Luckily for him, he has several means to improve his situation. The Hero has a certain number of Action Points (AP) available each round in his pool. He can spend these APs to perform his Actions. He can Move to an adjacent Sector, or Run (this has a higher cost, but allows to move farther with one single Action).
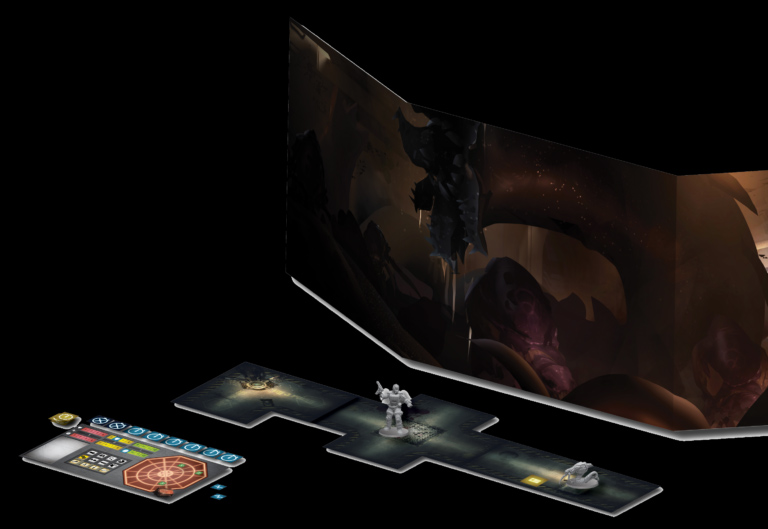
Hero starts the game with the complete map hidden behind the Evil screen.
Moving into an Unrevealed Sector like this can be extremely dangerous, though. If that Sector contained any kind of menace (a Creature or an Alert token) and the Hero stumbles upon them, he will have to pay the consequences for his recklessness (a Creature will attack him for free, an Alert token may be used by the Evil players to trigger other nasty effects, etc.). But if he Explores a Sector before moving, he forces the Evil players to Reveal it, i.e. to place it in front of him. This includes any Creature or Alert token that may be there! When a menace is revealed in front of him, the Hero can freely enter that sector without incurring in any unpleasant side effect. It’s really satisfying for the Hero to deduce the position of a Creature, explore that sector and discover that he was right… also because this gives him the chance to perform an Attack on that Creature and get rid of it for good!
Using the Radar is another very important Action. With it, the Hero can ask for the distance of a target sector (for example, if he knows that he needs to reach the Lab to complete his current mission, he can use his radar before and after moving, to check if he is getting nearer to it rather than moving away). Of course, the Evil players must be honest about it, and they must always tell the hero the quickest (i.e. shortest) route.
The Hero can also Search for items, drawing Item cards from Hero deck and finding useful tools which can greatly improve his chances for survival. However, each one has a limited number of Charges, i.e. they can be used for a limited number of times. Finally, the Hero can perform many different Actions grouped under the common name of Engineering. These include Using or Combining items (sacrificing Charge tokens from an Item to upgrade the effect of another one); Defusing Traps (i.e. removing revealed Alert tokens); Welding/Un-welding a door (to barricade into a room, or to stop a Creature from chasing him); and finally, Repairing Lights.
Light is very important in the game, especially for the Hero. His limited field of view is mainly caused by the darkness that envelops the map. When he finds one of the broken Light Control Units, though, he can Repair it and switch the lights back on in a few adjacent Sectors. These get Revealed for free. In addition to that, many Creatures (being dark-dwelling beings) deal less damage when exposed to light… or no damage at all! What was a very dangerous Creature just moments before may be rendered completely harmless, an easy target for the Hero! The Evil players will need to take this into account, when placing or moving their minions.
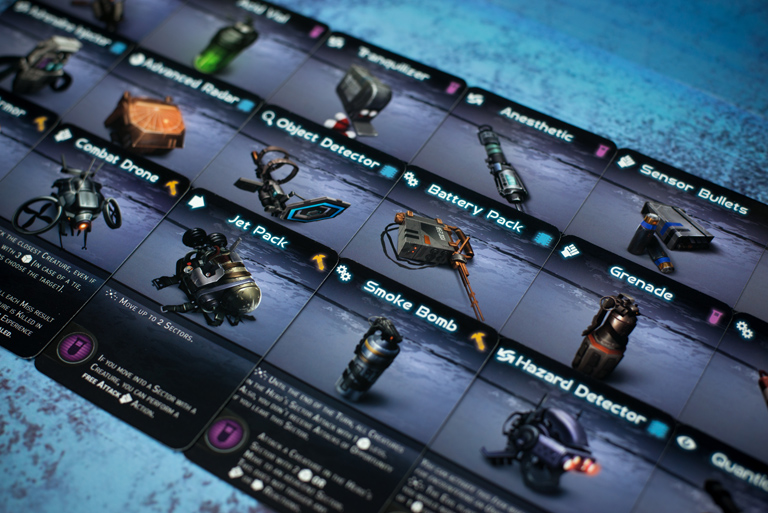
Item cards help the Hero in his solitary journey.
Finally, let’s look at the Hero’s stats: Health Points, Self-Control, and Adrenaline. The Hero sheet has two meters: the HP meter and the SC meter. The HP meter measures the physical damage he takes, while the SC meter measures the psychological damage. Both meters are divided into green, yellow and red areas, each one including several spaces. As the Hero takes damage (of both kinds), his Health tokens will gradually move from the green areas to the yellow, and then red, ones. Approaching the red zone means that the Hero’s life will be more and more in danger, but it also has an advantage.
The Hero starts each round with a certain amount of Adrenaline tokens: when he spends APs to perform an Action, he may spend 1 Adrenaline to prevent the Evil players from Reacting - this means that they won’t be able to play effects to counter or weaken that Action, and/or that he will also be able to perform the next Action without being interrupted. Since the amount of Adrenaline tokens he can use each round is limited, they have to be used wisely. But when his health levels reach the yellow/red zones, he will have more Adrenaline at his disposal at the beginning of each round! When on the brink of death, this small advantage is often what is needed to save his life.
Stay tuned on Discovering Alone: the next article will explain the Evil gameplay.
Previous articles: Game Overview, The World of Alone, Designers' Diary.
Next articles: Evil Gameplay, The Art of Alone
* "Discovering Alone" articles were originally published during the first game's Kickstarter project, by Horrible Guild's team.


Follow Us on