
Reclaiming Lost Victory Points Locations
A situation that occurs quite often is when the Free Peoples player is faced with an imminent loss unless able to reclaim a lost Victory Points location. This naturally happens late in the game as the Shadow is about to complete a military victory and the Ring-bearers need more time to complete their perilous quest. Quite often the Free Peoples player is faced with a situation in which he needs to buy himself another turn (or two) to destroy the Ring, and the only way to do this is to reclaim a Stronghold or City captured by the enemy. It is advisable to have this in mind throughout the game and try to create a powerful strike force to use if the need arises. Mustering heavily in a Gondor or Rohan region (preferably with the help of some Event Cards) might allow you a chance to retake Edoras, Helm’s Deep, Minas Tirith, Pelargir, or perhaps Dol Amroth late in the game. A Victory Points location in the DEW-line can also be reclaimed if you manage to muster in any of the other Settlements in the DEW-line. The Shadow must use his units in the most cost effective way to capture your Strongholds and Cities quickly without using too many units. Sometimes the surviving Shadow units move on to another Victory Points location and the units left behind are too few to defend the captured region, and sometimes what is left of a successful Shadow siege is unable to properly defend the Stronghold if you manage to launch a counter attack.Drawing the Eye Away from Frodo
The Free Peoples player can also become the aggressor to force the Shadow to focus in other places than the ones he wants to. Forcing the Shadow to use his precious Action Dice to reinforce vulnerable Victory Point locations could buy just enough time for Frodo to reach the Crack of Doom; every die not used to attack your regions or to Hunt the Fellowship is a die wasted for the Shadow. This strategy is best exemplified by the use of the Event Card “The Last Battle”...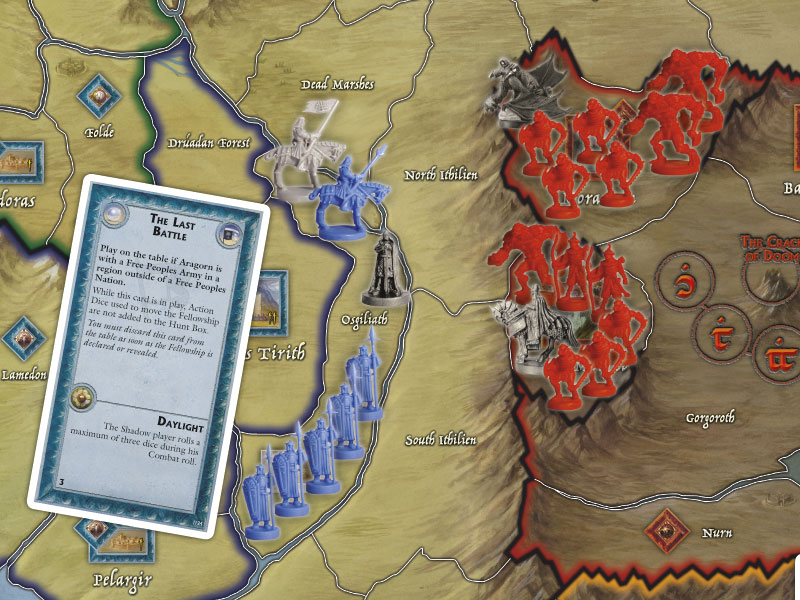
To the Last Battle - Click to Zoom
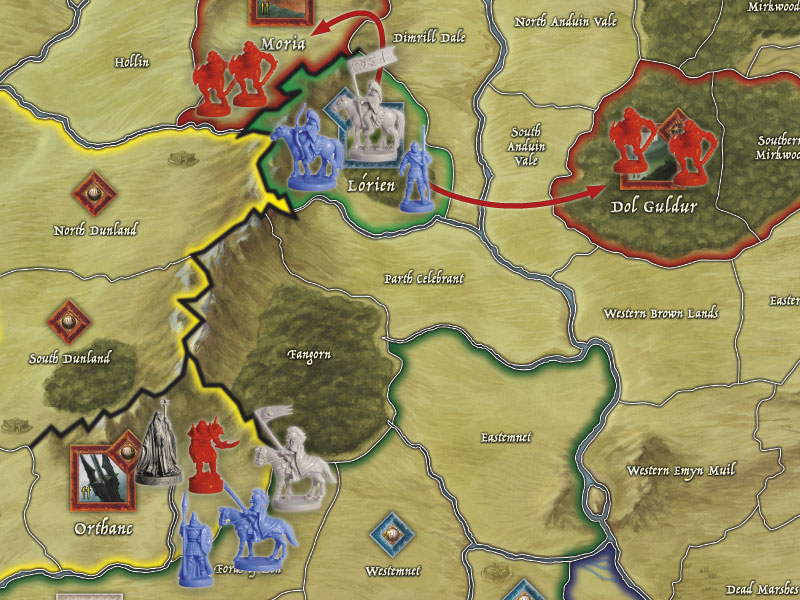
Attacking Dol Guldur - Click to Zoom
The Free Peoples Military Victory
Finally there is the military victory, which often seems like an unobtainable goal for the Free Peoples player, but once in a while it might be your best option. First we must distinguish that there are two different kinds of Free Peoples Military Victories. The first one is the one where you spot a mistake in the Shadow player’s game plan and try to strike as he has exposed himself. This strategy cannot be meticulously planned for; as it arises from mistakes in the Shadow player’s play, unlucky Action Die rolls for your opponent, or good use of Event Cards at opportune times by you, most likely a combination of all three. The second kind of Free Peoples Military Victory is the one in which the Free Peoples player goes all out military from turn one (or very early in the game). Your early Action Dice are used to separate all the Companions from the Fellowship, moving them to Moria—from where they can spread across Middle-earth to activate the Nations of the Free Peoples. Strider has to reach Gondor as soon as possible and Gandalf should reappear as his more powerful incarnation as soon as the Action Dice let him. Where you situate the other Companions depend on what Nations you intend to use in the coming attack, here the Event Cards you draw in the beginning of the game might be the decisive factor. This strategy should be used sparsely since a vigilant Shadow player will spot it early and take the proper countermeasures, and in doing so not only prevents you from winning but also ensures a win for the Shadow. Once you have decided to go for a military win you will need to use all available Action Dice in the effort. If your attempt fails the Shadow will have an overwhelming lead on you since not only have you abandoned the Fellowship, you have also lost many of your possible reinforcements in the battles. This however, should not refrain you from trying to achieve your military victory conditions once in a while!Closing Comments
No matter why you are attacking there are a few things to remember and to take advantage of:- Whenever you attack remember to use your Companions (if possible) in the attacking forces since the majority of your best Combat Cards are tied to the presence of Companions amongst the combatants.
- Gandalf the White’s ability to negate all Nazgûl Leadership in a battle cannot be overestimated.
- Make sure you don’t jeopardize Aragorn and Gandalf the White needlessly, if you lose them you will also lose that precious extra Action Die they each provide.
- The Event Card “Through a Day and a Night” will allow you to move an Army with a Companion two regions, used properly it can be used to launch a surprise attack on a Shadow Stronghold before the Shadow has enough time to muster enough defenders.
- The Shadow can afford to lose some of his units, you cannot. Never commit to an attack that will become a war of attrition.


Follow Us on